 Once
the house was enclosed, the next step was to insulate it. This is a view of
one living room corner after the insulation was installed.
Once
the house was enclosed, the next step was to insulate it. This is a view of
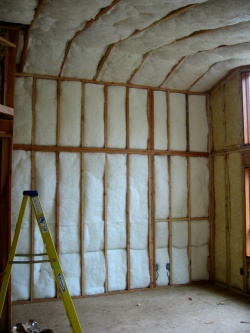
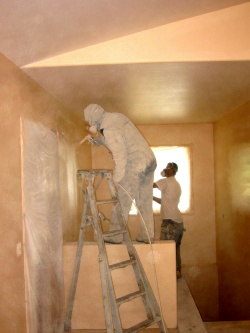
one living room corner after the insulation was installed. When last we looked at the end of March, the house had just been enclosed and the heating, rough plumbing and rough electrical had just been installed. We now have the insulation and drywall installed and the entire interior painted. The oak flooring is installed and the cabinets are being installed. The main remaining items are the tile floors, interior doors and trim, appliance installation, and the finish plumbing and electrical work. When we first began this adventure over a year ago, we were hoping to move in by Christmas. When we had the first contractor walk out on us, we adjusted the goal to Easter. Anybody for the 4th of July? We think it should be virtually finished by then, but we plan on spending the rest of July moving our stuff from the rental house. The following summarizes the steps that occurred in April and May.
Once
the house was enclosed, the next step was to insulate it. This is a view of
one living room corner after the insulation was installed.
 Next
came the drywall - being delivered on the left and after it was installed in
the living/dining room on the right.
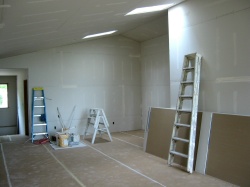
Next
came the drywall - being delivered on the left and after it was installed in
the living/dining room on the right.
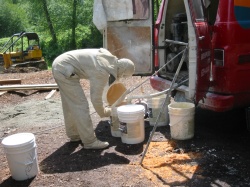
 Then
came the paint. While it looks like this might be a biohazard response crew,
we were assured that they were painters. The guy on the left is mixing the paint.
It is then pumped from the truck to the spray gun as seen on the right. After
it is sprayed on, it is smoothed out with a roller. That's what the guy in front
of the window is doing.
Then
came the paint. While it looks like this might be a biohazard response crew,
we were assured that they were painters. The guy on the left is mixing the paint.
It is then pumped from the truck to the spray gun as seen on the right. After
it is sprayed on, it is smoothed out with a roller. That's what the guy in front
of the window is doing.
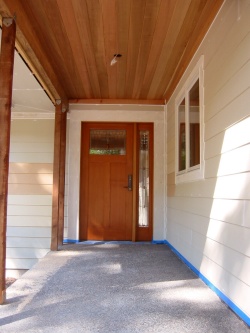
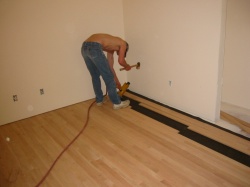 Once
the walls and ceilings were painted, we could install the oak flooring in the
living, dining room, and bedrooms. What you see is the nailing which, it turns
out, is the easy part. The hard part is laying out the oak boards to get them
aligned and staggered properly for both visual and strength reasons.
Once
the walls and ceilings were painted, we could install the oak flooring in the
living, dining room, and bedrooms. What you see is the nailing which, it turns
out, is the easy part. The hard part is laying out the oak boards to get them
aligned and staggered properly for both visual and strength reasons.
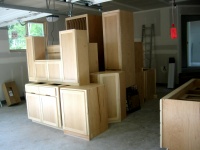
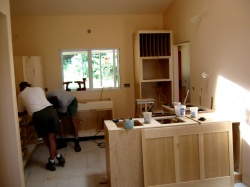 The
concrete boards have been installed in the kitchen and bath rooms in preparation
for the floor tile. At the same time, the kitchen cabinets are being installed.
They were delivered in the middle of April and were stacked in the garage awaiting
their turn, which has finally come. The tall cabinet in the corner will house
the ovens. The peninsula in front separates the kitchen from the dining nook.
The
concrete boards have been installed in the kitchen and bath rooms in preparation
for the floor tile. At the same time, the kitchen cabinets are being installed.
They were delivered in the middle of April and were stacked in the garage awaiting
their turn, which has finally come. The tall cabinet in the corner will house
the ovens. The peninsula in front separates the kitchen from the dining nook.
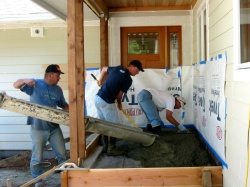
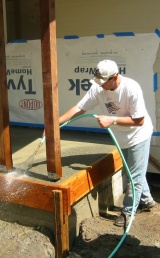 Mean
while, on the outside, we had the concrete slabs for the main basement door,
the side garage door, and front porch poured. On the left, they're doing the
front porch. We wanted a rough pebblely finish. It turns out this is achieved
by ordering a particular concrete mix, pouring it and smoothing it as usual,
but then flushing the surface off with a hose after it is partially dry.
Mean
while, on the outside, we had the concrete slabs for the main basement door,
the side garage door, and front porch poured. On the left, they're doing the
front porch. We wanted a rough pebblely finish. It turns out this is achieved
by ordering a particular concrete mix, pouring it and smoothing it as usual,
but then flushing the surface off with a hose after it is partially dry.
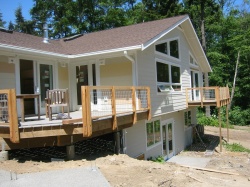 For
the last update, the decks were just being installed. Ralph, our contractor,
finished the deck floors. However, since I was bugging him for a job beyond
priming the outdoor trim, he suggested I do the deck rails. The first plan was
to go with stainless steel which would have meant simply buying the metal posts
and installing them. That turned out to be too expensive and Ralph suggested
framing galvanized iron mesh in a cedar frame. This turned out to be a much
harder job. In addition to building the frame, it required grooves to be cut
in the frame to accept the iron mesh. The hardest part, though, was laying out
the posts. For maximum strength, every span between posts had to be a multiple
of 4 inches since that was the size of the mesh, but the total length (alas)
was never quite a multiple of 4 inches. We do like the finished product (shown
here). Or should I say almost finished. As I was cutting the last groove in
a 16 foot 2x4, my radial arm saw of 15 years died after 8 feet. I'm planning
on buying a new one on Saturday so I can finish the job.
For
the last update, the decks were just being installed. Ralph, our contractor,
finished the deck floors. However, since I was bugging him for a job beyond
priming the outdoor trim, he suggested I do the deck rails. The first plan was
to go with stainless steel which would have meant simply buying the metal posts
and installing them. That turned out to be too expensive and Ralph suggested
framing galvanized iron mesh in a cedar frame. This turned out to be a much
harder job. In addition to building the frame, it required grooves to be cut
in the frame to accept the iron mesh. The hardest part, though, was laying out
the posts. For maximum strength, every span between posts had to be a multiple
of 4 inches since that was the size of the mesh, but the total length (alas)
was never quite a multiple of 4 inches. We do like the finished product (shown
here). Or should I say almost finished. As I was cutting the last groove in
a 16 foot 2x4, my radial arm saw of 15 years died after 8 feet. I'm planning
on buying a new one on Saturday so I can finish the job.

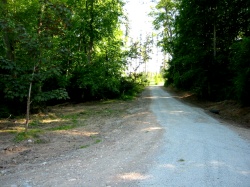 As
part of the final grading of the lot, we had them redo our short private road
shared by four lots. On the left is the Apple Tree Lane street sign which was
originally installed in 1994, but was somehow torn out and lost. We discovered
it under eight years of brush growth and I reinstalled it at the "intersection"
with Scenic Avenue. On the right is a picture of Apple Tree Lane now appropriately
crowned to handle the famous Seattle rains.
As
part of the final grading of the lot, we had them redo our short private road
shared by four lots. On the left is the Apple Tree Lane street sign which was
originally installed in 1994, but was somehow torn out and lost. We discovered
it under eight years of brush growth and I reinstalled it at the "intersection"
with Scenic Avenue. On the right is a picture of Apple Tree Lane now appropriately
crowned to handle the famous Seattle rains.
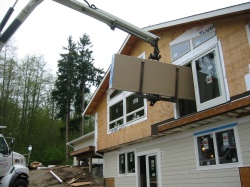
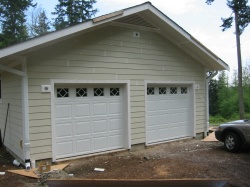 On
the left is the front door and porch and, on the right, the garage doors. The
paint patches next to the front door was done by Sooja to test colors.
On
the left is the front door and porch and, on the right, the garage doors. The
paint patches next to the front door was done by Sooja to test colors.