Framing & Roof
When last we looked in the middle of December,
the framing of the basement had just been completed. We now have a roof and
work is accelerating. But, I get ahead of myself.
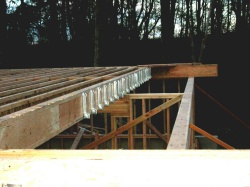
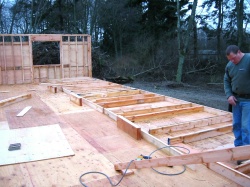
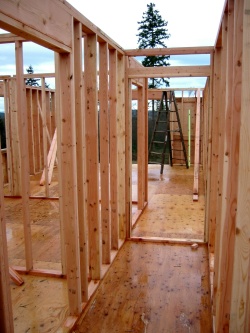
 The
next step was to layout and attach the floor joists on top of the basement framing.
This was a straightforward operation with all the joists being layed down in
parallel. Except, of course, for the little bit of character our designer had
added. He suggested a slight overhang on the east side to break up the vertical
wall and, also, shield the basement door from the rain. That required adding
some perpendicular stub joists to support the overhang. The stub joists are
anchored in the metal supports shown below left and extend out over the lower
level as seen below right.
The
next step was to layout and attach the floor joists on top of the basement framing.
This was a straightforward operation with all the joists being layed down in
parallel. Except, of course, for the little bit of character our designer had
added. He suggested a slight overhang on the east side to break up the vertical
wall and, also, shield the basement door from the rain. That required adding
some perpendicular stub joists to support the overhang. The stub joists are
anchored in the metal supports shown below left and extend out over the lower
level as seen below right.
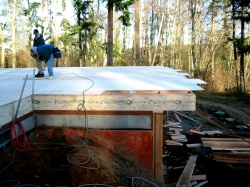 The right picture also shows the next construction step of attaching plywood
to the joists to form the main level floor. We could now walk on the main level
and view the surroundings from the height we will eventually experience them.
The right picture also shows the next construction step of attaching plywood
to the joists to form the main level floor. We could now walk on the main level
and view the surroundings from the height we will eventually experience them.
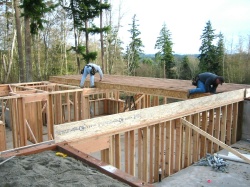
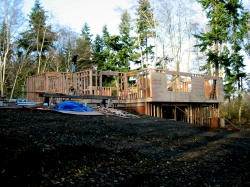 Next
came the walls for the main level. At left, the west wall is in place and the
north wall is being built on the floor before it is raised into position. Also
shown is an overall view with most of the exterior walls up.
Next
came the walls for the main level. At left, the west wall is in place and the
north wall is being built on the floor before it is raised into position. Also
shown is an overall view with most of the exterior walls up.
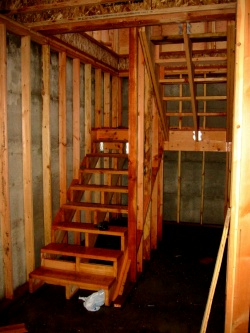 The
interior walls were also framed at this time. To the left is a view down the
hallway to the master bedroom. The big opening behind the ladder will be the
sliding doors to the deck. While the framing was going on, Ralph, our contractor,
roughed in the stairwell so we could get from the lower level to the main level.
The
interior walls were also framed at this time. To the left is a view down the
hallway to the master bedroom. The big opening behind the ladder will be the
sliding doors to the deck. While the framing was going on, Ralph, our contractor,
roughed in the stairwell so we could get from the lower level to the main level.
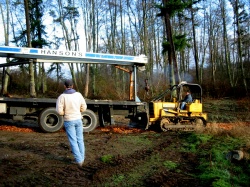
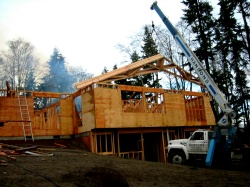 With
the walls up, we needed a roof. The muddy slope caused a problem in getting
the crane into place, but a little help from the a bulldozer did the trick.
It was then able to lift the prebuilt trusses and lay them out in four piles
on top of the framed walls.
With
the walls up, we needed a roof. The muddy slope caused a problem in getting
the crane into place, but a little help from the a bulldozer did the trick.
It was then able to lift the prebuilt trusses and lay them out in four piles
on top of the framed walls.
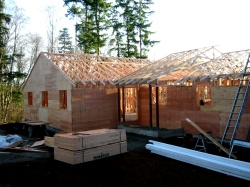
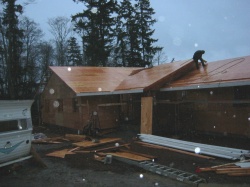 The
framing team managed to get all the trusses up in one day (left). Putting on
the plywood took a bit longer and experienced some downpours. It was so dark
on this day that the camera triggered the flash which you see here reflecting
off of raindrops.
The
framing team managed to get all the trusses up in one day (left). Putting on
the plywood took a bit longer and experienced some downpours. It was so dark
on this day that the camera triggered the flash which you see here reflecting
off of raindrops.
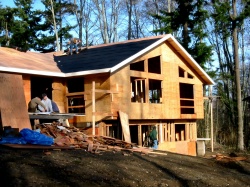 Luckily
the sun was out the next day and partially dried the roof before the roofer
layed down the tar paper that goes underneath the shingles. This is a view of
the east side of the house. The set of four openings are for the living room
windows. The openings to the right of those are for the door and windows in
the master bedroom. Here you can also see the white trim lumber that covers
the eaves.
Luckily
the sun was out the next day and partially dried the roof before the roofer
layed down the tar paper that goes underneath the shingles. This is a view of
the east side of the house. The set of four openings are for the living room
windows. The openings to the right of those are for the door and windows in
the master bedroom. Here you can also see the white trim lumber that covers
the eaves.
That brings us up to date which is in fact January
25, 2003.